Posts

New spark plugs and topped up coolant
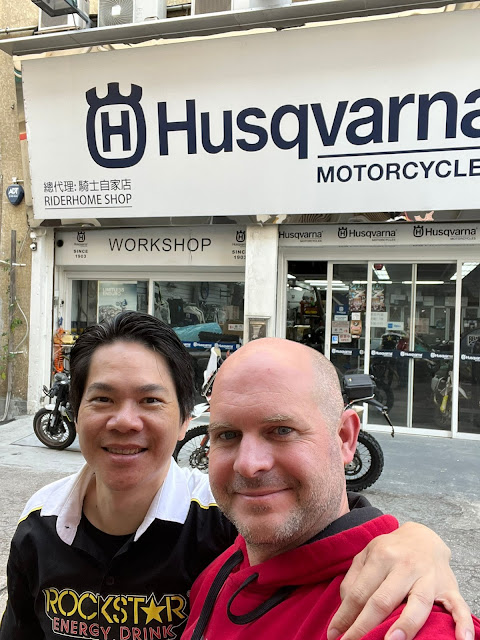
Image
As there is now only two days left until I'm leaving the bike with the shipping agent I quickly scanned the user manual for things I haven't checked. Two things popped in to my mind when reading the service schedule: spark plus and coolant. Spark plugs requires most attention so will be more details below. Getting the spark plugs from Ben, in the picture above, who is the local Hong Kong Husqvarna dealer and this was likely the last visit to his shop for a year or so. To remove spark plugs first use a torx tool to unscrew the ignition coil holders. There is one screw on each side. Remove the connectors and pull out the coil plug The inner one is a bit tricker to reach so you can use a screw driver as leverage Once the coils are out you can wiggle out the coil holders and expose the spark plugs. Unscrew the spark plugs with a 14mm hex key. The diameter of the hex key has to be about 20mm or less in order to fit into the inner plug hole You can now unscrew the spark plugs and tak...

A new set of tyres and tubes

Image
  Since I've been riding around on the same tyres for the past 6 years I reckon it made sense to put on a new set of tyres. Not that the old ones were totally used up but it just felt better to have fresh rubber when you start the trip. I also like to put in heavy duty (3mm) or ultra heavy duty (4mm) inner tubes to minimize the risk of punctures. The tools needed Lift the front wheel off the ground with the enduro stand. Undo the four front bolts with a torx key and undo the main bolt with a big wrench. Empty the tyre of air by removing the valve stem (if you have the tool) or just pressing down the little spike inside the valve. Put the tyre on top of the new tyre and break the bead so the tyre comes off from the rim. Repeat on other side. You can also use the tyre irons to help doing this. Start about 20 cm right of the valve with one tyre iron and another 20 cm further away to get the tyre off the rim. Press down the tyre on the other side so it stays in the center drop to give ...

Reverse bleeding the clutch

Image
  On a bike the clutch is a pretty useful thing to have working. I have had a couple of incidents in the past with non working clutch, in southern Brazil and in Holland, and it is a pain especially when starting the bike. However, the clutch is not as critical as in a car and especially at speed you can change gear without using the clutch. I heard MX riders prefer to do it instead of letting go of critical fingers on the handlebar. However, given I have time before departure and the fact I haven't even change the clutch fluid once since I bought the bike I reckon it was about time anyway to give it some love. First of all you need some tools. A large syringe with a hose and some new fresh hydraulic fluid. I found some of the Motorex hydraulic fluid in the bike shop nearby. A second syringe is handy as well to empty the master cylinder with and this one needs no hose. Key tools is a 8mm wrench for the bleeder valve on the slave cylinder and a 5mm hex key to loosen the master cylind...

Safety box

Image
  While travelling with soft luggage the obvious questions is where do you store your precious stuff like passports, documents and money. If someone steals a T-shirt it doesn't matter much but if you loose the passport there is a bigger problem. The solution idea I got from the guys at North and Left a Bit who used Pelican cases. So I simply needed one to go on the back plate which I found in the Ossa shop in Kowloon .   The idea was to put it as much forward to cover the rear bolts so it is not easy to just screw it off but not too much forward so that the lid to the rear tank is covered. A happy medium seemed to be when the rear of the box just hit the rear of the rack. To hold it in place I got some nuts and bolds with a small plate to go under the back plate. This in addition to two forward points which are mostly there to stop the box swinging around. Inside I added a small reinforcement around the plate since the pelican box is not too thick although the material i...

Toolbox

Image
  Having just soft luggage on the bike this time there was a need for somewhere to store the tools since I don't want to drag them around more than necessary. There is some spare space on the right hand size under the pannier racks on the right hand side. The reason for it is that the racks are symmetrical while the exhaust pipe only sits on the left side. My shipping guy Edwin in Sai Kung, Hong Kong found this very useful vendor on eBay which I bought the toolbox from. It is initially intended to carry manuals for agricultural vehicles. It is perfect in size and twists open and has a water tight seal. It is however not designed for heavy equipment and vibrations. It is also not lockable. These two things we need to sort out.  First thing is to make sure it doesn't interfere with the lashing and rachet system for the luggage Second thing is to reinforce the attachments with hose clips to hold more weight. They should also be able to carry the tyre levers on top with an extra ...